
Keeping a home clean takes time and effort. Most people spend hours each week vacuuming, sweeping, and mopping. However, technology has changed the way we approach household chores. Robotic vacuum cleaners are now smarter, faster, and more connected than ever before. With the right setup, you can build a smart home cleaning system that works on its own — even when you are away.
This guide will walk you through everything you need to know. From choosing the right robot vacuum to connecting it with other home automation cleaning tools, you will learn how to create a seamless cleaning routine that saves time and energy.
Why a Smart Cleaning System Makes Sense
Life is busy. Between work, family, and personal time, cleaning often falls to the bottom of the list. A smart cleaning system solves this problem by automating the most repetitive tasks. Therefore, you get more time to focus on what matters.
Modern robot vacuums do more than just pick up dust. They map your home, avoid obstacles, and learn your floor plan over time. Additionally, many of them connect to your smartphone, smart speakers, and other devices. This connectivity turns a single gadget into part of a larger, intelligent ecosystem.
The benefits are clear:
- Consistent daily cleaning without manual effort
- Real-time notifications when a job is done
- Scheduled cleaning routines based on your lifestyle
- Integration with voice assistants like Alexa and Google Home
- Reduced allergens and dust through frequent automated passes
Step 1: Choose the Right Robotic Vacuum
The first step is picking the best robot vacuum for your home. Not all models are equal. You need to consider your floor type, home size, and the level of smart features you want.
For hardwood floors and low-pile carpets, most mid-range models work well. However, if you have thick rugs or pet hair, look for a model with strong suction and a tangle-free brush roll. Homes with multiple rooms benefit from vacuums that use LiDAR or camera-based mapping. These tools create accurate digital floor plans and allow the vacuum to clean room by room.
Key features to look for include:
- Auto-empty base station (empties the dustbin automatically)
- Multi-floor mapping (saves layouts for different levels)
- Obstacle detection (avoids furniture, cables, and pet waste)
- Mop and vacuum combo (handles both tasks in one pass)
- Long battery life (at least 90 minutes per charge)
Top brands to consider are iRobot Roomba, Roborock, Ecovacs Deebot, and Dreame. Each offers models at different price points with varying smart features.
Step 2: Set Up Your Home Wi-Fi Network Properly
A smart cleaning system depends on a strong and stable Wi-Fi connection. Therefore, before you set up any device, make sure your home network is reliable.
Most robot vacuums work on 2.4 GHz Wi-Fi. Some newer models also support 5 GHz. Place your router in a central location to reduce dead zones. If your home is large, consider adding a mesh Wi-Fi system. Brands like Eero, Google Nest Wi-Fi, and TP-Link Deco provide whole-home coverage without signal drops.
Once your network is solid, connect your robot vacuum to its companion app. This step is usually straightforward. Open the app, follow the on-screen instructions, and your vacuum is ready to receive commands from anywhere.
Step 3: Create Cleaning Schedules and Zones
One of the biggest advantages of a smart robot vacuum is scheduling. You can set it to clean every day at a specific time, even when you are not home. Additionally, many apps allow you to divide your floor plan into zones and assign cleaning priorities.
For example, you might want the kitchen and living room cleaned every day, while the bedroom only needs attention three times a week. Use the app to set these preferences. The vacuum will follow your instructions without any further input.
No-go zones are equally useful. These are virtual boundaries you draw in the app to keep the vacuum away from certain areas — like a pet’s water bowl or a pile of shoes. This prevents the robot from getting stuck or causing a mess.
Step 4: Integrate with Smart Home Platforms
A robot vacuum becomes truly powerful when it joins your broader smart home setup. Modern AI home gadgets work together through platforms like Amazon Alexa, Google Home, Apple HomeKit, and Samsung SmartThings. Connecting your vacuum to one of these platforms allows you to control it with your voice and automate it alongside other devices.
Here are a few helpful integrations to consider:
- “Alexa, start cleaning the kitchen” — voice command to begin a specific zone clean
- Set the vacuum to start when you leave home using geofencing
- Trigger a cleaning session when your smart doorbell detects a visitor has left
- Pause cleaning automatically when a baby monitor detects noise
These kinds of automations turn your home into a responsive environment. Furthermore, you can manage everything from a single app or dashboard, which makes the whole system much easier to use.
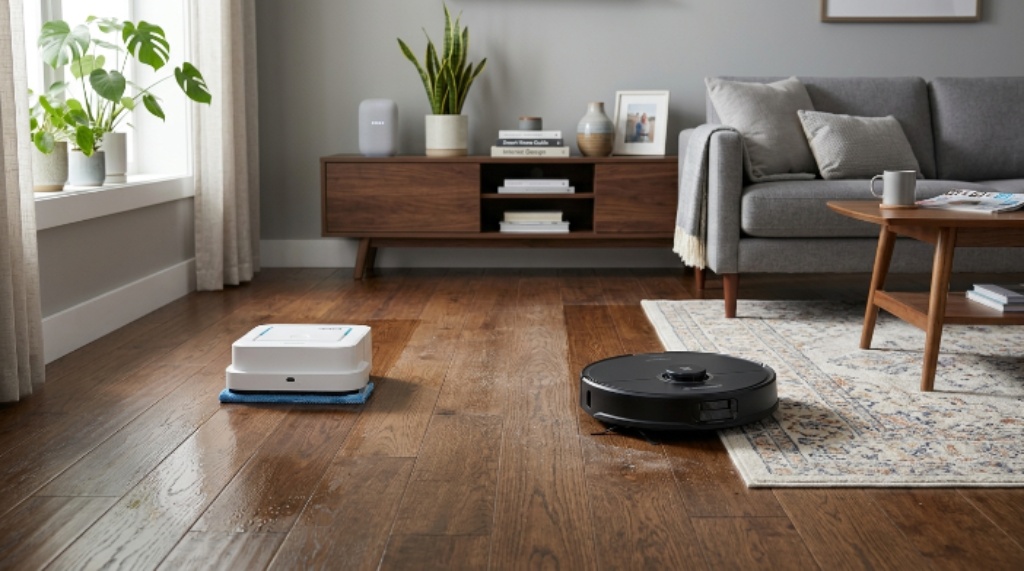
Step 5: Add a Robot Mop to Complete the System
Vacuuming alone is not enough for hard floors. Therefore, adding a robot mop to your setup is a natural next step. Some robot vacuums include a mopping function built in, while others work best when paired with a dedicated mopping robot.
Brands like Roborock and Ecovacs offer models that vacuum and mop in one pass. However, if you want a deeper clean, dedicated mops like the iRobot Braava Jet or the Narwal Freo offer better mopping performance. These devices use clean and dirty water tanks to avoid spreading grime across the floor.
Together, a robot vacuum and a robot mop cover all the major floor cleaning needs in your home. Consequently, your floors stay clean on a daily basis without any manual scrubbing.
Step 6: Use Smart Appliances to Automate the Whole Routine
Building a complete cleaning system goes beyond just the floor. Smart appliances extend the automation to every part of your home. Air purifiers with scheduling features run while the vacuum operates, capturing the dust the robot stirs up. Smart trash cans with sensors alert you when bins are full. Robot window cleaners handle glass surfaces with minimal effort.
Connecting these smart appliances through a unified platform ties the entire routine together. You can set up a “Cleaning Mode” that activates the vacuum, mop, and air purifier all at once. This kind of coordinated routine is where home automation cleaning tools truly shine. The result is a home that maintains itself with very little daily effort from you.
Step 7: Maintain Your Robot Vacuum for Long-Term Performance
A smart cleaning system is only as good as its maintenance routine. Robot vacuums need regular care to keep working at their best. Fortunately, modern models make this easier with self-emptying bases and auto-wash mop pads.
Here is a simple maintenance checklist:
- Empty the dustbin or check the base station bag every 1 to 4 weeks
- Clean the brush roll to remove tangled hair and debris weekly
- Wipe the sensors with a dry cloth monthly to maintain navigation accuracy
- Replace filters every 2 to 3 months for optimal suction
- Update the firmware regularly through the companion app
By staying on top of these small tasks, your robot vacuum will continue to deliver reliable performance for years.
Conclusion
Building a smart home cleaning system with robotic vacuum cleaners is easier than most people think. The process starts with choosing the right robot vacuum for your space and setting up a dependable Wi-Fi network. From there, you can create custom schedules, define cleaning zones, and connect your vacuum to voice assistants and smart home platforms. Adding a robot mop and other smart appliances rounds out the system into a fully automated cleaning routine.
Home automation cleaning tools have come a long way in recent years. Today, they offer the kind of convenience and intelligence that was once only possible in science fiction. Whether you are a first-time buyer or upgrading an existing setup, the steps in this guide will help you build a system that keeps your home clean with minimal effort from you.
Frequently Asked Questions
What is the best robotic vacuum for a smart home setup?
The best choice depends on your needs, but top options include the iRobot Roomba j9+, Roborock S8 Pro Ultra, and Ecovacs Deebot X2 Omni. These models offer strong suction, advanced mapping, self-emptying bases, and deep integration with smart home platforms.
Can I control my robot vacuum when I am not at home?
Yes. Most modern robot vacuums connect to companion smartphone apps that allow full remote control from anywhere with an internet connection. You can start, stop, pause, or schedule a cleaning session no matter where you are.
How do I stop my robot vacuum from getting stuck?
Use the no-go zone feature in the app to block off problem areas. Additionally, tidy up loose cables, pick up small objects from the floor, and use physical barriers like magnetic strips in spots the app cannot cover.
Do robot vacuums work on thick carpets?
Many do, but performance varies by model. Look for vacuums with at least 2500 Pa of suction and a rubber brush roll. Models specifically designed for carpets include the Roomba s9+ and Roborock S8 MaxV Ultra.
Is it worth investing in both a robot vacuum and a robot mop?
For hard floors, yes. A vacuum handles dry debris, while a mop removes sticky residue and stains. Some combo units do both tasks reasonably well, but dedicated devices offer better results for each job. The combination provides the most thorough clean.
Related Topics:
Which Type of Sink Is Used for Dumping Mop Water?