
The bathroom is more than just a functional space; it’s a sanctuary, a place to unwind, refresh, and prepare for the day ahead or relax before turning in. In the quest to create a more luxurious, accessible, and modern bathroom, the walk-in shower has emerged as a highly desirable feature. Gone are the days of cumbersome tub/shower combos or cramped, curtained stalls. Today’s walk-in showers offer sleek lines, spa-like ambiance, and enhanced safety, making them a fantastic investment for homeowners of all ages and abilities.
But how do you go from dreaming about a spacious, open shower to actually having one? Installing a walk-in shower is a significant undertaking, involving plumbing, tiling, waterproofing, and potentially structural modifications. While it can be a DIY project for those with substantial home improvement experience, it often requires professional expertise. This guide will walk you through the entire process, from initial planning and material selection to the step-by-step installation, helping you understand what’s involved whether you tackle it yourself or hire a pro.
Planning Your Perfect Walk-in Shower Installation
Before a single tile is removed or a pipe is touched, meticulous planning is paramount. Rushing this stage is one of the biggest mistakes you can make. Careful consideration now will save you time, money, and headaches down the road.
Defining Your Vision and Needs: Start by asking yourself why you want a walk-in shower. Is it purely for aesthetics? Are you looking to improve accessibility for aging in place or for family members with mobility challenges? Do you need to maximize space in a small bathroom? Your motivations will influence design choices.
Consider the type of walk-in shower:
- Curbless (Barrier-Free): This design features a floor that flows seamlessly from the main bathroom area into the shower, with no threshold to step over. It offers the ultimate accessibility (ideal for wheelchairs or walkers) and a sleek, modern look. Achieving the necessary slope for drainage without a curb requires careful construction, often involving lowering the shower floor section or using specialized pre-sloped bases.
- Low-Curb: This popular option features a very minimal threshold (typically just a few inches high). It still provides easy entry compared to a traditional tub or high-curbed shower but offers a bit more water containment than a fully curbless design.
- Enclosure Style: Will it be fully open, use one or more fixed glass panels as splash guards, or have a frameless glass door? Open designs feel spacious but require careful planning regarding water splash and potentially managing drafts. Glass panels offer containment while maintaining an open feel.
Measuring and Layout: Accurate measurements are non-negotiable.
- Space Assessment: Measure the intended area meticulously. A minimum comfortable size for a walk-in shower is generally considered 36×36 inches (90×90 cm), but larger is often better for comfort and maneuverability, especially for accessible designs (e.g., 60×36 inches or 150×90 cm). Consider enough room to move, bend, and potentially use a shower seat.
- Existing Features: Note the location of existing plumbing (supply lines, drain), windows, electrical outlets, and ventilation fans. Rerouting plumbing significantly increases complexity and cost.
- Floor Plan: Sketch a simple floor plan. Visualize how the shower fits into the overall bathroom layout. Ensure doors (bathroom entry, shower door if applicable) can open without obstruction. Dry fitting a shower tray or marking the outline on the floor can help visualize the final dimensions.
Structural Considerations:
- Subfloor Integrity: The subfloor beneath the shower must be solid, level (before creating the slope), and capable of supporting the weight of the shower base, tiles, water, and occupants. If the subfloor is weak or damaged, it must be repaired or reinforced (e.g., adding blocking between joists, replacing damaged plywood). This is especially critical for heavier materials like stone or for curbless designs that involve modifying the floor structure.
- Wall Structure: Ensure wall studs are sound and plumb (perfectly vertical). You may need to add blocking between studs to securely mount fixtures, grab bars, or shower seats later.
Drainage and Slope: Proper drainage is arguably the most critical aspect. Water must flow efficiently to the drain to prevent pooling, leaks, and water damage.
- Slope Requirement: A minimum slope of 1/4 inch per foot (or a 2% slope) towards the drain is generally required for shower floors. For curbless showers, this slope needs to be integrated seamlessly into the floor design. Prefabricated shower pans come with the slope built-in.
- Drain Type and Location: Choose between a standard center drain or a linear drain (often placed along one edge or at the entrance). Linear drains are popular for curbless showers as they simplify tiling and handle water flow efficiently. The drain location must align with the existing or modified plumbing waste line.
Ventilation: Walk-in showers, especially open designs, release more steam and moisture into the bathroom compared to enclosed units. Upgrading your ventilation is crucial.
- Extractor Fan: Ensure you have a powerful, appropriately sized bathroom exhaust fan ducted to the outside (not just into the attic). Consider a fan with a humidity sensor for automatic operation.
- Window: If possible, having an operable window also helps with ventilation.
Permits: Most significant bathroom renovations, especially those involving plumbing or structural changes, require permits from your local building department. Check local regulations before starting work. Skipping permits can lead to fines and problems if you sell your home later.
Gathering Your Tools and Materials
Having everything on hand before you begin makes the process smoother. The exact list depends on your specific design (prefab pan vs. custom tile base, wall material, etc.), but here’s a general overview:
Essential Tools:
- Safety Gear: Safety glasses, work gloves, dust masks/respirator, knee pads, sturdy footwear.
- Demolition Tools: Pry bar, hammer, chisel, utility knife, reciprocating saw (if needed).
- Measuring & Layout: Tape measure, level (2ft and 4ft), framing square, pencil/marker.
- Cutting Tools: Circular saw (for subfloor/framing), tile saw (wet saw recommended for clean cuts), utility knife, hole saw kit, jigsaw.
- Plumbing Tools: Pipe wrenches, PEX crimpers/expansion tool (if using PEX), pipe cutter, plumber’s tape, PVC primer and cement (if applicable).
- Tiling Tools: Notched trowel (size depends on tile), flat trowel, margin trowel, tile spacers, grout float, sponges, buckets, tile nippers.
- Fastening Tools: Power drill/driver, appropriate screws (corrosion-resistant for wet areas), hammer.
- Caulking Gun.
- Mixing Tools: Buckets, drill with mixing paddle (for mortar/grout).
- Cleaning Supplies: Rags, shop vacuum, sponges.
Core Materials:
- Shower Base/Pan: Either a prefabricated shower pan (acrylic, fiberglass, composite, cultured stone) or materials for a custom mortar bed (deck mud/sand mix cement, metal lath if needed). For curbless, potentially a pre-sloped foam tray system.
- Drain Assembly: Specific to your chosen pan/base and drain type (standard round, square, linear). Ensure it’s compatible with your plumbing.
- Plumbing Supplies: Pipes (copper, PEX, PVC/ABS for drain), fittings, valves, shower valve body, supply lines.
- Framing Lumber: If modifying walls or adding blocking (2x4s or 2x6s).
- Wall Backer Board: Cement board (like HardieBacker or Durock) or specialized foam backer boards (like Kerdi-Board or Wedi Board) are essential for tile. Green board (moisture-resistant drywall) is NOT suitable for wet areas like shower walls.
- Waterproofing System: Critical! Options include:
- Liquid Membrane: Applied like thick paint (e.g., RedGard, Hydro Ban). Often used with reinforcing fabric tape at seams and corners.
- Sheet Membrane: Fabric or plastic sheets adhered to backer board (e.g., Kerdi, Schluter-Systems). Requires specific thin-set mortar.
- Integrated Board Systems: Some foam backer boards are inherently waterproof or part of a system with specialized sealants (e.g., Wedi).
- Tile: Ceramic, porcelain, natural stone, glass. Choose tiles rated for shower floors (often smaller format for better grip and conforming to slopes) and walls. Consider non-slip options for the floor.
- Thinset Mortar: Specific type depends on your tile and substrate (e.g., modified thin-set for membranes/backer board). Follow manufacturer recommendations.
- Grout: Sanded or unsanded (depends on joint width), potentially epoxy grout for maximum stain/mold resistance. Choose a color.
- Silicone Sealant/Caulk: 100% silicone specifically designed for kitchens and baths (mold/mildew resistant). Needed for joints between different materials (pan-to-wall, wall corners, around fixtures).
- Fixtures: Shower valve trim kit, shower head (and arm), handheld sprayer (optional), diverter (if applicable).
- Glass Panels/Door: If part of your design, including hardware (channels, clamps, hinges).
- Fasteners: Corrosion-resistant screws for backer board, potentially nails for framing.
- Shims: For leveling the pan/base.
Step-by-Step Walk-in Shower Installation Guide
This is a general guide; always prioritize the specific instructions from the manufacturers of your chosen shower pan, waterproofing system, and fixtures. Complex steps, especially plumbing and curbless floor construction, are often best left to professionals unless you have significant experience.
Phase 1: Demolition and Preparation
- Safety First: Turn off water supply to the bathroom at the main shut-off valve or local shut-offs. Verify water is off by opening faucets. Turn off electricity to any circuits in the work area at the breaker box.
- Clear the Area: Remove everything from the bathroom that could get damaged or be in the way. Protect adjacent floors and fixtures with drop cloths or plastic sheeting.
- Demolition: Carefully remove the old tub, shower enclosure, tiles, and drywall/backer board down to the wall studs in the designated shower area. Remove old flooring if necessary. Be cautious not to damage plumbing or electrical wiring hidden in walls. Dispose of debris properly.
- Inspect Framing and Subfloor: Examine the exposed studs and subfloor. Check for water damage, rot, or structural issues. Make necessary repairs now – replace damaged wood, reinforce joists if needed. Ensure the subfloor area where the pan will sit is level (you’ll create the slope on top of this level base, or the pan itself provides the slope).
- Clean Up: Thoroughly clean the area, vacuuming up all dust and debris. A clean workspace is safer and ensures better adhesion for subsequent materials.
Phase 2: Plumbing Adjustments
- Assess Existing Plumbing: Determine if the existing drain location and supply lines are suitable for your new shower layout and valve.
- Relocate/Adjust Plumbing (If Necessary): This is often the most complex part and where professional help is highly recommended.
- Drain: Adjust the drain pipe (usually PVC or ABS) to align perfectly with the new shower drain location. This might involve cutting into the subfloor (carefully!) and reconfiguring pipes. Ensure proper traps and venting according to code.
- Supply Lines: Reroute hot and cold water supply lines (copper or PEX) to the location of the new shower valve.
- Shower Valve Installation: Install the shower valve body securely to blocking between studs at the desired height (follow manufacturer’s instructions precisely regarding setback depth from the finished wall surface).
- Test for Leaks: Once connections are made (but before closing walls), temporarily turn the water back on carefully and check all joints and connections for leaks. Address any drips immediately.
Phase 3: Installing the Shower Base/Pan (or Creating a Sloped Floor)
- Option A: Prefabricated Shower Pan Installation
- Dry Fit: Place the shower pan in position, ensuring it sits flat on the subfloor and aligns correctly with the drain pipe. Check for level across the top flanges using your level.
- Mark Drain: Trace the drain opening onto the subfloor if needed for alignment.
- Apply Mortar Bed (Often Recommended): Although some pans can sit directly on a level subfloor, many manufacturers recommend (or require) setting the pan in a layer of thin-set mortar or a sand-mix mortar bed. This fully supports the base, prevents flexing, and reduces noise. Mix the mortar to a supportive consistency (not too wet) and spread it evenly on the subfloor where the pan will sit.
- Set the Pan: Carefully lower the pan into the mortar bed (or onto the subfloor if no mortar is used), pressing down firmly and ensuring it’s perfectly level across the flanges. Align the pan’s drain opening precisely over the drain pipe.
- Connect Drain: Install the drain assembly according to the manufacturer’s instructions. This usually involves applying sealant (like silicone or plumber’s putty, depending on the drain type) and tightening compression fittings or solvent-welding PVC parts. Ensure a watertight seal. Some drains connect from above, others require access from below.
- Level and Shim (If Needed): Double-check that the pan flanges are perfectly level. Use shims between the subfloor and pan only if absolutely necessary for minor adjustments, ensuring the pan remains fully supported.
- Secure the Pan (If Required): Some pans have flanges with pre-drilled holes for screwing into studs. Use recommended corrosion-resistant screws, being careful not to overtighten and crack the flange. Other systems rely on the mortar bed and surrounding construction for stability. Avoid drilling through the pan body itself unless explicitly instructed.
- Allow Mortar to Cure: If a mortar bed was used, allow it to cure completely according to the manufacturer’s instructions (typically 24-48 hours) before proceeding or putting weight on the pan. Protect the pan surface during subsequent steps.
Option B: Custom Mortar Bed / Curbless Shower Floor This is significantly more complex and requires precision. It generally involves:
-
- Recessing the Subfloor (for Curbless): Often, the subfloor in the shower area needs to be lowered (by cutting joists and reinforcing, or using lower-profile joists) to accommodate the thickness of the mortar bed and tile while keeping the finished shower floor flush with the bathroom floor. This is structural work and requires expertise.
- Pre-Slope: Creating an initial sloped layer of mortar (the “pre-slope”) directly on the subfloor, pitched 1/4″ per foot towards the drain.
- Pan Liner Installation: Installing a waterproof membrane liner (like CPE or PVC) over the pre-slope, extending up the walls several inches, and clamped securely into a specialized drain assembly. Corners must be carefully folded (not cut below the curb height).
- Final Mortar Bed: Pouring the main mortar bed over the pan liner, again sloping perfectly towards the drain. This is the surface the tile will adhere to. Alternative: Using specialized bonded waterproofing systems like Schluter-Kerdi, which often involve a pre-sloped foam tray set directly on the subfloor (potentially recessed for curbless), with a sheet membrane bonded directly to it and the walls, ready for tiling. These systems eliminate the traditional multi-layer mortar bed and liner.
Phase 4: Waterproofing the Shower Area This is arguably the most critical phase after drainage. Failure here leads to leaks, mold, and costly repairs. Never rely on tile and grout alone for waterproofing.
- Choose Your System: Select your waterproofing method (liquid, sheet membrane, integrated board system) and follow the manufacturer’s instructions to the letter.
- Apply to Walls:
- Liquid Membrane: Apply coats using a brush or roller over the installed backer board, ensuring the correct thickness (often measured with a wet film gauge). Pay extra attention to corners and seams, often embedding reinforcing fabric tape into the first coat while wet, then applying subsequent coats over it.
- Sheet Membrane: Apply the recommended thin-set mortar to the backer board with a notched trowel. Carefully embed the membrane sheets into the wet mortar, smoothing out all air bubbles with a flat trowel or specialized tool. Overlap seams according to instructions (usually 2 inches). Use pre-formed corners for inside and outside corners for a more reliable seal.
- Apply to Floor (if Custom Base): Extend the waterproofing membrane down the walls and seamlessly integrate it with the shower base waterproofing (either the pan liner extending up the walls or the membrane applied over the final mortar bed/foam tray). Ensure a continuous, unbroken waterproof barrier from the floor up the walls to the desired height (at least 6 feet or to the shower head height, often higher).
- Seal Penetrations: Carefully seal around the shower valve, shower arm pipe, and any niches using manufacturer-recommended sealants or pre-formed sealing collars designed for the specific membrane system.
- Curing Time: Allow the waterproofing system to cure completely as specified by the manufacturer before proceeding. This can range from hours to days. Do not rush this step. Consider performing a flood test (plugging the drain and filling the base with a couple of inches of water for 24 hours) to check for leaks, especially with custom mortar beds/liners.
Phase 5: Installing Wall Backer Board (if not already done as part of waterproofing) If your waterproofing system is applied over the backer board (like liquid or sheet membranes), the backer board needs installing first.
- Measure and Cut: Measure wall sections and cut cement board or foam backer board to size using appropriate tools (utility knife with multiple passes for cement board, hand saw for foam boards). Plan layout to minimize seams.
- Install: Fasten the backer board directly to the wall studs using specified corrosion-resistant screws (check manufacturer for screw type and spacing). Keep the bottom edge of the board slightly above the shower pan flange or finished mortar bed (typically a 1/4-inch gap) – do not let it sit directly on the pan/floor. This gap will be sealed later. Stagger seams between rows.
- Tape Seams (Cement Board): For cement board, embed alkali-resistant mesh tape in thin-set mortar over all joints and corners before applying the main waterproofing layer. Foam board systems often use specialized sealant or membrane bands for seams.
Phase 6: Tiling Walls and Floor
- Plan Layout: Determine your tile pattern and starting point. Use a level and chalk line or laser level to establish perfectly level and plumb reference lines. Aim for balanced cuts at edges and corners. Dry-lay some tiles to visualize the pattern.
- Mix Thin-Set: Mix the appropriate thin-set mortar according to manufacturer instructions to a peanut butter-like consistency. Mix only what you can use within its pot life.
- Apply Mortar: Spread mortar onto a section of the backer board (or shower floor) using the flat side of the trowel, then comb ridges using the notched side held at a consistent 45-degree angle. Work in small manageable sections.
- Set Tiles: Press tiles into the mortar with a slight twisting motion. Use tile spacers for consistent grout lines. Check periodically with a level to ensure tiles are flat and even. Remove excess mortar from joints before it hardens.
- Cut Tiles: Use a wet saw for straight cuts and tile nippers or an angle grinder with a diamond blade for curved cuts (around fixtures). Smooth sharp edges.
- Allow Mortar to Cure: Let the thin-set cure fully (usually 24-48 hours) before grouting. Do not walk on floor tiles during this time.
Phase 7: Grouting
- Remove Spacers: Take out all tile spacers.
- Mix Grout: Mix grout according to directions to a smooth, consistent paste.
- Apply Grout: Force grout into the joints using a rubber grout float held at a 45-degree angle, working diagonally across the tiles. Ensure all joints are completely filled. Remove excess grout from the tile surfaces with the float held nearly perpendicular.
- Initial Cleaning: Wait for the grout to set slightly (check instructions, usually 15-30 minutes). Use a damp (not wet) grout sponge to gently clean excess grout off the tile surfaces, rinsing the sponge frequently in clean water. Be careful not to pull grout out of the joints.
- Final Haze Removal: After several hours (or as directed), a light haze may form on the tiles. Buff this off with a clean, dry microfiber cloth.
- Cure Time: Allow the grout to cure completely (can take several days to weeks depending on type and conditions) before sealing or exposing to heavy water use.
Phase 8: Installing Fixtures
- Install Trim Kits: Attach the escutcheon plate and handle for the shower valve.
- Install Shower Arm and Head: Apply plumber’s tape to the threads of the shower arm pipe coming out of the wall. Screw on the shower arm, then the shower head. Install handheld sprayer components if applicable.
- Install Accessories: Mount grab bars (ensure they are screwed into solid blocking), shower seats, niches, or shelves as planned.
Phase 9: Installing Shower Door/Enclosure (If Applicable)
- Follow Manufacturer Instructions: Glass enclosure installation varies significantly by design (fixed panels, sliding doors, pivot doors). Follow the specific instructions provided with your kit meticulously.
- Measure and Mark: Accurately measure and mark locations for wall channels, thresholds, or pivot points.
- Drill Holes: Carefully drill any necessary holes into tile and backer board (use a diamond-tipped bit for tile, start slowly to avoid cracking).
- Secure Components: Install channels or brackets, ensuring they are plumb and level.
- Hang Door/Set Panels: Carefully lift and place glass panels or doors into position. Secure them according to the instructions. This often requires assistance due to the weight and fragility of glass.
- Apply Sealant: Apply silicone sealant along edges where metal frames meet tile/pan as specified by the manufacturer.
Phase 10: Final Sealing and Caulking This is the final waterproofing step, sealing joints where different materials meet or where movement might occur.
- Clean Joints: Ensure all joints to be caulked are completely clean, dry, and free of dust or grout residue.
- Apply 100% Silicone Caulk: Apply a neat bead of silicone sealant to:
- The joint between the shower pan/base and the bottom row of wall tiles.
- All inside corners where tiled walls meet.
- Around the escutcheon plate of the shower valve and shower arm.
- Where the tile meets a tub deck (if applicable).
- Around the frame of the shower enclosure where it meets the walls and base.
- Smooth the Bead: Smooth the caulk bead immediately after application using a wet finger, a caulk finishing tool, or painter’s tape for clean lines.
- Cure Time: Allow the caulk to cure fully (usually 24 hours) before using the shower.
DIY vs. Hiring a Professional: Making the Right Choice
Installing a walk-in shower is a complex project with little room for error, especially concerning waterproofing and plumbing.
Consider DIY If:
- You have extensive home renovation experience, including plumbing and tiling.
- You are meticulous, patient, and comfortable following detailed instructions.
- You have all the necessary tools (or are willing to buy/rent them).
- The project is relatively straightforward (e.g., replacing an existing shower with a prefab pan in the same location).
- You have ample time to dedicate to the project.
Hire a Professional If:
- You have limited DIY experience.
- The project involves significant plumbing relocation or structural changes (like recessing a subfloor for a curbless design).
- You want a high-end custom tile job or complex features.
- Proper waterproofing techniques seem daunting.
- You want the job done efficiently and correctly the first time, with a warranty on workmanship.
- Your time is limited.
Finding a Good Contractor:
- Get multiple quotes (at least three).
- Check licenses, insurance (liability and worker’s comp), and bonding.
- Ask for references and look at portfolios of previous bathroom renovations.
- Get a detailed written contract specifying the scope of work, materials, timeline, payment schedule, and warranties.
Related: Bath vs. Shower: Deep Dive into Differences, Benefits, and Choosing Your Ideal Cleanse
Cost Considerations for Your Walk-in Shower Installation
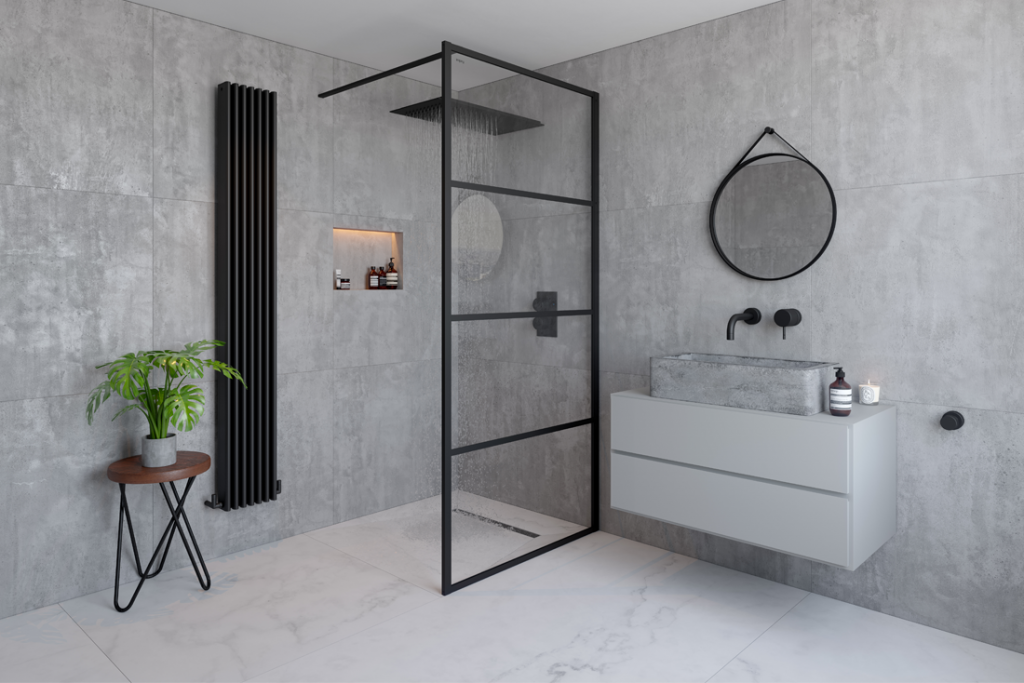
The cost can vary dramatically based on several factors:
- Project Scope: A simple replacement using a prefab kit is much cheaper than a full custom build with relocated plumbing and high-end materials. A tub-to-shower conversion typically falls somewhere in between, involving demolition and potential plumbing adjustments. Costs for conversions can range from $1,200 to $8,000 or more.
- Prefab vs. Custom:
- Prefabricated Kits: Shower pans/bases range from $400 (fiberglass/acrylic) to over $2,000 (composite/cultured stone). Full kits including walls and doors might cost $700 to $3,000+. Installation is generally less labor-intensive.
- Custom Showers: Building from scratch offers limitless design but is significantly more expensive. Expect costs from $4,200 to $8,500 and potentially much higher ($15,000 – $20,000+) for complex designs, luxury materials, and extensive labor.
- Materials:
- Tiles: Prices range wildly from $2/sq ft for basic ceramic to $17+/sq ft for porcelain, and $10-$65+/sq ft for natural stone (marble, granite).
- Fixtures: Basic shower heads/valves might cost $100, while high-end systems (rain heads, multiple jets, thermostatic valves) can run $1,000+.
- Glass: Frameless glass enclosures are more expensive than framed or semi-frameless options. Costs increase with glass thickness and special coatings.
- Labor: This is a major cost component, especially for custom builds. Expect to pay $400 – $2,000+ just for installation labor on top of materials. Rates vary by location and contractor type:
- Plumbers: $45 – $200+ per hour
- Tile Installers: $30 – $120+ per hour (or per square foot)
- General Contractor: Often manages the project, coordinating subcontractors.
- Accessibility Features: Grab bars ($100-$500 installed), built-in benches ($75-$700+), non-slip tiles add to the cost.
- Unexpected Issues: Budget for potential surprises like discovering rotten subfloors or needing unexpected plumbing upgrades (10-15% contingency recommended).
- Permits: Factor in permit fees required by your municipality.
Overall Average: While a basic prefab DIY install might be possible for under $2,000 (excluding major plumbing changes), professionally installed walk-in showers typically range from $6,000 to $12,000, with an average around $9,000. High-end custom projects can easily exceed $15,000-$20,000.
Maintaining Your Beautiful New Walk-in Shower
To keep your investment looking great and functioning properly:
- Regular Cleaning: Clean tile, grout, and glass regularly (weekly or bi-weekly) using pH-neutral cleaners designed for bathrooms. Avoid harsh abrasives or acidic cleaners that can damage grout and sealant.
- Squeegee Glass: Use a squeegee on glass doors/panels after each use to prevent water spots and soap scum buildup.
- Ventilate: Always run the exhaust fan during and for 15-20 minutes after showering to remove moisture and prevent mold/mildew growth.
- Check Sealant: Periodically inspect the silicone caulk joints (corners, base, around fixtures). If sealant is cracked, peeling, or moldy, remove the old caulk completely and reapply fresh silicone.
- Grout Sealing: Seal grout lines periodically (annually or as needed, depending on the sealer used) to help prevent staining and moisture absorption, unless you used epoxy grout which doesn’t require sealing.
- Drain Maintenance: Keep the drain clear of hair and debris to ensure proper water flow.
Related: Why a Roll Top Bath is the Perfect Addition to Your Bathroom
People Also Ask (FAQs) About Walk-in Shower Installation
Q1: What is the main difference between a walk-in shower and a regular shower?
A: The primary difference is the entry. Walk-in showers have a very low or completely absent threshold (curb), allowing you to simply “walk in” without a significant step up or over. Regular showers typically have a higher curb or are part of a bathtub combination requiring a large step. Walk-ins often feel more open and are more accessible.
Q2: Are walk-in showers harder to waterproof?
A: Not necessarily harder, but the waterproofing must be meticulously executed, especially for curbless designs. Because there’s less physical containment (no high curb), the waterproofing system (membrane, seals, proper slope) is absolutely critical to prevent water from escaping the designated shower area and damaging surrounding structures. Professional installation is often recommended to ensure this is done correctly.
Q3: Do walk-in showers make the bathroom floor wet?
A: If properly designed and installed, they shouldn’t significantly wet the main bathroom floor. Key factors include:
- Adequate Size: A larger shower area contains splashes better.
- Correct Slope: Ensures water flows towards the drain, not outwards.
- Drain Efficiency: A well-placed, correctly sized drain (especially linear drains) handles water flow effectively.
- Splash Guards: Glass panels strategically placed can contain most water.
- Shower Head Placement: Aiming the shower head away from the opening helps. A small amount of splash might occur, but a well-designed walk-in shower controls the vast majority of the water.
Q4: How long does it take to install a walk-in shower?
A: Installation time varies greatly. A straightforward replacement using a prefab kit might take a professional 2-4 days. A complex custom build involving significant demolition, plumbing changes, intricate tile work, and curing times for mortar/waterproofing can take 1-3 weeks or longer. DIY projects typically take longer.
Q5: Are walk-in showers good for small bathrooms?
A: Yes, they can be excellent for small bathrooms. Eliminating the bulk of a bathtub or a heavily framed enclosure can make the room feel significantly larger and more open. A corner installation or using clear glass panels enhances the sense of space. However, ensure you still meet minimum size requirements (like 36×36 inches) for comfortable use.
Q6: Is a walk-in shower a good investment for resale value?
A: Generally, yes. Updated bathrooms are a major selling point. A well-designed, modern walk-in shower, particularly one that enhances accessibility, appeals to a wide range of buyers and can increase a home’s marketability and potential value.
Conclusion: Stepping into Style and Comfort
Installing a walk-in shower is a transformative upgrade for any bathroom. It offers unparalleled style, a spa-like experience, improved safety, and enhanced accessibility. Whether you opt for a sleek curbless design or a practical low-curb model, the result is a more open, modern, and functional space.
While the installation process is involved, requiring careful planning, precise execution, and an unwavering focus on waterproofing, the rewards are significant. By understanding the steps, considering the costs, and deciding whether to DIY or hire a professional, you can confidently embark on this project. The end result will be a beautiful, durable, and highly enjoyable addition to your home – a daily luxury you’ll appreciate for years to come.