
Starting a reef aquarium doesn’t have to drain your bank account. While this hobby can become expensive quickly, smart shopping and strategic choices help you maintain healthy water conditions without overspending. Test kits are essential for any reef tank, but finding affordable options that still deliver reliable results requires some knowledge and planning.
Many new hobbyists assume they need the most expensive equipment to succeed. However, plenty of budget-friendly test kits provide accurate readings when used correctly. The key is knowing which parameters to prioritize, understanding different testing methods, and recognizing where you can save money without compromising your livestock’s health.
This guide will help you navigate the world of affordable reef testing equipment. You’ll discover how to build a complete testing setup without breaking the bank, identify which tests matter most for your budget aquarium setup, and learn strategies for stretching your testing budget further.
Prioritizing Essential Tests
Not every parameter needs testing from day one. Starting with the most critical tests and adding others gradually helps spread costs over time while keeping your tank healthy.
Ammonia and nitrite testing is absolutely essential during the initial cycling period. Fish and invertebrates produce waste that breaks down into these toxic compounds. During cycling, beneficial bacteria colonies develop to process these substances. Testing daily during this phase prevents you from adding livestock too early, which could lead to deaths and wasted money.
Alkalinity affects coral growth and pH stability more than almost any other parameter. Once your tank is cycled and you begin keeping corals, alkalinity testing becomes crucial. This should be your first priority after ammonia and nitrite tests.
Nitrate monitoring helps prevent algae problems that plague many reef tanks. Excessive nitrates fuel unwanted algae growth that can smother corals and make your tank unsightly. A basic nitrate test kit costs very little but provides valuable information.
pH testing offers useful insights, though it’s less critical if you’re already monitoring alkalinity. Many hobbyists skip dedicated pH tests initially, especially when working within tight budgets. Alkalinity and pH are closely related, so stable alkalinity usually means acceptable pH.
Calcium and magnesium become important once you’re keeping stony corals that build skeletons. However, these tests can wait until you’ve established stable alkalinity and are ready to add corals. Spreading out purchases reduces initial expenses.
Understanding Different Testing Methods
The testing method you choose significantly impacts both cost and accuracy. Each approach has advantages and disadvantages that affect your budget differently.
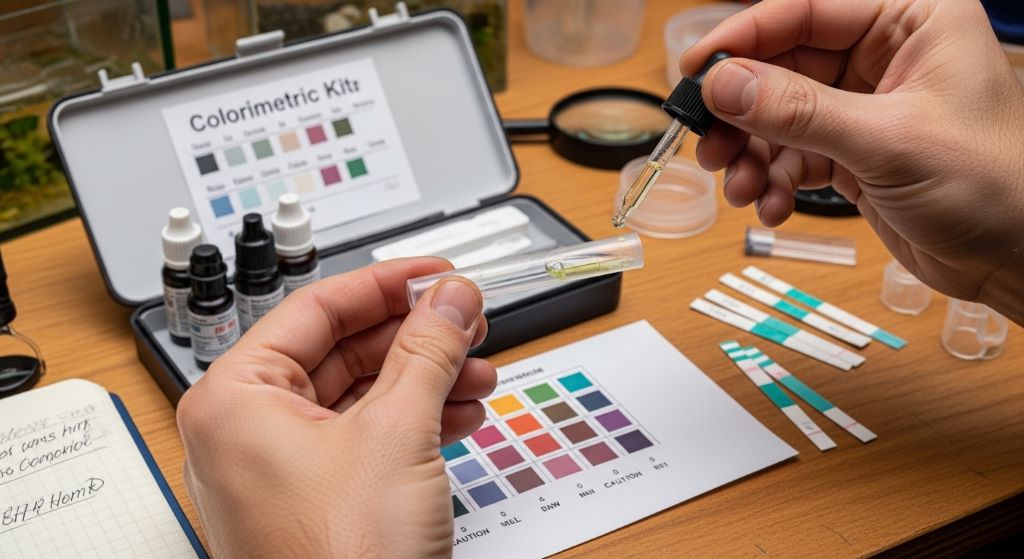
Liquid reagent kits offer the best balance between affordability and reliability. These kits use chemical solutions that react with water samples to produce color changes. You compare the color to a chart to determine parameter levels. Quality liquid kits cost between fifteen and thirty dollars and include enough reagent for dozens of tests.
Test strips provide the cheapest option for water quality check purposes. A bottle of strips costs just a few dollars and contains many tests. However, accuracy suffers compared to liquid kits. Strips work better for approximate readings or quick checks rather than precise monitoring. They’re acceptable for some parameters but inadequate for critical measurements like alkalinity.
Titration kits deliver excellent precision by having you add reagent drop by drop until a color change occurs. While slightly more expensive than basic liquid kits, they remain affordable and provide superior accuracy for alkalinity testing. Many experienced hobbyists recommend spending a bit more for titration-based alkalinity tests.
Digital meters cost significantly more upfront but eliminate color-matching challenges. However, they’re difficult to justify when building a budget aquarium setup. Stick with liquid or titration kits initially, then upgrade to digital equipment later if desired.
Shopping Strategies for Budget-Conscious Hobbyists
Where and when you buy test kits affects your total cost substantially. Smart shopping can cut your testing expenses by half or more.
Online retailers often beat local fish store prices by twenty to forty percent. Websites specializing in aquarium supplies buy in bulk and pass savings to customers. Additionally, online shopping lets you easily compare prices across multiple vendors within minutes.
Bundle kits that test multiple parameters cost less than buying individual tests separately. A master test kit covering five or six parameters typically runs thirty to fifty dollars, while purchasing each test individually might total seventy to one hundred dollars. Bundle kits are perfect for beginners who need several different tests.
Generic or store brands sometimes perform as well as name brands at lower prices. However, research before buying unknown brands. Read reviews from other reef keepers to ensure the product delivers accurate results. Saving money on an inaccurate test kit ultimately costs more in dead livestock.
Sales and clearance items offer opportunities for significant savings. Sign up for email newsletters from aquarium retailers to receive notifications about sales. Black Friday, Cyber Monday, and holiday promotions often include discounts on test kits.
Buying refills instead of complete new kits reduces long-term costs. Many manufacturers sell replacement reagents separately for less than complete kits. Keep the test tubes and bottles from your original kit and just replace the reagent when it runs out.
Stretching Your Testing Budget
Several strategies help you get more value from every dollar spent on testing supplies while maintaining accurate water quality check results.
Test only when necessary rather than on a fixed schedule. Mature, stable tanks don’t require daily testing of every parameter. Once you establish consistent levels, reduce testing frequency for stable parameters while continuing to monitor critical ones like alkalinity regularly.
Share costs with other local hobbyists. If you know other reef keepers in your area, consider splitting bulk purchases of test kits. Some parameters don’t need testing as frequently, so sharing between two or three people makes expensive kits more affordable.
Extend reagent life through proper storage. Keep test kits in cool, dry places away from direct sunlight. Heat and humidity cause reagents to degrade faster, shortening their useful life. Storing kits in climate-controlled areas rather than humid fish rooms or hot garages preserves them longer.
Use distilled water for rinsing test equipment between uses. Tap water contains minerals that contaminate reagents and give false readings. While distilled water costs money, using just a small amount to rinse test tubes significantly extends reagent life by preventing contamination.
Learn to recognize when reagents are still good versus when they’ve expired. Some reagents work well past their printed expiration dates if stored properly. However, others degrade quickly and need replacement. Research your specific kits to understand which reagents tolerate age and which don’t.
DIY Testing Solutions
Some parameters can be monitored through observation and alternative methods, reducing your need for expensive test kits.
Visual algae assessment indicates nutrient levels without formal testing. If hair algae or cyano bacteria appear suddenly, you likely have rising nitrates or phosphates. While this doesn’t give exact numbers, it alerts you to problems and suggests when formal testing might be needed.
Coral behavior reveals water quality issues. Corals that suddenly close up, lose color, or stop extending polyps are signaling problems. While you’ll still need tests to identify specific issues, watching your corals closely helps you catch problems early.
Reference solutions allow you to verify test kit accuracy without buying expensive calibration fluids. Mix synthetic seawater according to package directions. This gives you water with known parameters you can test to confirm your kits are working correctly.
Additionally, some hobbyists create their own reagents for certain tests. However, this requires chemistry knowledge and careful measurement. For most people, the time investment and potential for error make DIY reagents impractical despite the cost savings.
When to Invest More Money
While keeping costs down is important, some situations justify spending more on better equipment. Recognizing these circumstances protects your investment in livestock.
Critical parameters like alkalinity deserve better test kits. Alkalinity swings damage corals quickly, so accurate monitoring is essential. Spending an extra ten or fifteen dollars on a high-quality alkalinity test kit prevents coral deaths that cost far more to replace.
Persistent problems that cheaper kits can’t resolve may require professional testing. If you’re troubleshooting mysterious coral deaths or algae outbreaks, comprehensive ICP testing reveals issues that home kits miss. While expensive at fifty to seventy-five dollars per test, ICP analysis can solve problems worth hundreds in lost livestock.
Colorblind hobbyists struggle with color-comparison tests. If you have difficulty distinguishing colors, investing in digital meters makes sense despite the higher cost. Accurate readings matter more than staying strictly within budget when color perception is unreliable.
High-value livestock deserves closer monitoring. If you’re keeping expensive corals worth hundreds of dollars, investing in precise testing equipment is sensible insurance. The cost of premium test kits pales compared to losing rare corals due to parameter fluctuations.
Maintaining Testing Equipment
Proper care extends the life of budget-friendly test kits, maximizing your investment and delaying replacement purchases.
Clean test tubes thoroughly after each use. Residual reagent or aquarium water contaminates future tests, wasting reagent and producing false readings. Rinse tubes with distilled water and allow them to air dry completely.
Tighten caps immediately after using reagents. Exposure to air causes some chemicals to oxidize or evaporate, reducing their effectiveness. Taking an extra second to secure caps properly prevents premature reagent degradation.
Mark purchase dates on test kits. This helps you track how old reagents are and when replacement might be necessary. Knowing the age of your reagents helps you judge whether unusual readings reflect actual water parameters or expired chemicals.
Store kits away from aquarium heat and humidity. The warm, moist environment near tanks accelerates reagent breakdown. Keep test kits in a different room if possible, or at least in a closed cabinet away from the tank.
Alternative Testing Resources
Sometimes the most affordable option is not testing yourself at all, at least initially.
Local fish stores often offer free or low-cost water testing. Many shops test customer water samples for free or for a small fee. While you can’t test as frequently as needed for a new tank, this service helps you verify your own test results or get readings when you can’t afford a particular test kit.
Experienced hobbyists in local aquarium clubs frequently help beginners. Club members often test water samples for new members free of charge. Additionally, they can recommend which budget-friendly kits work well and which ones to avoid.
Online forums sometimes coordinate group buys for test kits and supplies. Members pool orders to reach bulk pricing, then split shipments. This approach combines the affordability of bulk purchases with the reality that individual hobbyists don’t need massive quantities.
However, relying on others for testing isn’t sustainable long-term. Use these resources as temporary solutions while you budget for your own test kits, not as permanent replacements for proper monitoring.
Building Your Testing Kit Over Time
You don’t need every test kit immediately. Strategic purchasing over several months makes quality testing affordable even on tight budgets.
Start with cycling tests only. Purchase ammonia and nitrite tests first. These are essential and inexpensive. You can’t safely add livestock without these tests, so they must be your first priority.
Add alkalinity testing before introducing corals. Once your tank finishes cycling and you’re ready for corals, invest in a good alkalinity test kit. This single test prevents more coral problems than any other.
Incorporate nitrate testing within the first few months. Nitrate accumulates slowly, so you have time before it becomes problematic. Adding this test by month three or four helps you catch rising levels before algae becomes unmanageable.
Finally, add calcium and magnesium tests as your coral collection grows. New coral keepers can often maintain these parameters through regular water changes alone. As your coral load increases, monitoring and supplementation become necessary.
Conclusion
Finding affordable reef test kits requires balancing cost with accuracy and reliability. Start with essential tests for cycling your tank, then gradually add other parameters as your budget aquarium setup matures. Prioritize quality for critical measurements like alkalinity while accepting budget options for less crucial parameters.
Smart shopping through online retailers, bundle purchases, and sales events significantly reduces your testing costs. Proper storage and maintenance extends the life of affordable kits, providing excellent value over time. Remember that consistent testing with budget-friendly equipment beats sporadic testing with expensive gear.
Building your testing capability gradually makes the expense manageable while ensuring you can properly monitor your water quality check requirements. The money you save on testing equipment can go toward quality livestock, lighting, or other important equipment. With careful planning and strategic purchases, you can maintain excellent water conditions without overspending.
Your corals and fish depend on stable water parameters regardless of what you paid for your test kits. Focus on accuracy and consistency rather than brand prestige, and you’ll achieve excellent results while keeping your hobby affordable.
Frequently Asked Questions
What’s the minimum I should spend on test kits for a new reef tank?
Plan to spend between forty and sixty dollars initially for basic cycling tests, alkalinity, and nitrate kits. This provides essential monitoring capability without excessive expense. You can add calcium, magnesium, and other tests later as needs develop. Investing in at least mid-quality kits for critical parameters like alkalinity is worth the extra few dollars.
Are cheap test strips accurate enough for reef tanks?
Test strips work adequately for rough estimates of some parameters like nitrate, but they lack precision for critical measurements. Avoid using strips for alkalinity testing, as accuracy is crucial for coral health. Strips serve better as backup testing or quick checks rather than primary monitoring tools. Spend a bit more on liquid or titration kits for important parameters.
How can I tell if a budget test kit is reliable?
Read reviews from other reef keepers on forums and social media groups. Compare test results against known standards like fresh synthetic saltwater. Test the same sample with different kits if possible to verify consistency. Additionally, reputable but affordable brands like API and Red Sea offer reliable entry-level kits that many hobbyists trust.
Can I skip certain tests entirely to save money?
You can delay some tests but never completely skip essential monitoring. Ammonia and nitrite are mandatory during cycling. Alkalinity testing is crucial once you keep corals. However, you can postpone calcium and magnesium testing initially if doing regular water changes. pH testing is optional if you’re monitoring alkalinity regularly.
How long do test kit reagents typically last?
Unopened reagents usually last two to three years when stored properly. Once opened, most remain accurate for six to twelve months if kept cool and dry with tight caps. However, shelf life varies by manufacturer and chemical composition. Always check expiration dates and replace reagents that produce questionable results, even if not yet expired.
Related Topics:
How to Install an Aquarium Pump Step by Step (Beginner Friendly)
How to Clean a Non-Stick Contact Grill the Right Way