
Painting a room can feel exciting. But choosing the right tape? That part trips up a lot of homeowners. Walk into any hardware store and you will find a wall of tape options. Different colors, widths, and labels can make the decision confusing. However, picking the right tape matters more than most people realize. The wrong choice can lead to paint bleeding under the edges, peeling surfaces, or sticky residue that is hard to remove.
This guide will walk you through everything you need to know. By the end, you will feel confident choosing tape that fits your project perfectly.
Why the Right Tape Makes a Difference
Tape does a simple job. It protects surfaces you do not want to paint. However, not all tape performs equally. Some tapes grip too hard and pull off fresh paint when removed. Others do not seal tightly enough, letting paint creep underneath.
A clean paint line takes skill and the right materials. Even the most careful painter will struggle without tape that holds firm and releases cleanly. Additionally, the surface you are painting on plays a big role. Walls, trim, glass, and delicate wallpaper each need different tape types.
Getting this right from the start saves time and frustration. Therefore, understanding your options is the first step toward a professional-looking finish.
Understanding the Basic Types of Tape
Before you choose, it helps to know what is available. There are several tape types commonly used in painting. Each one has strengths and specific uses.
General-Purpose Masking Tape
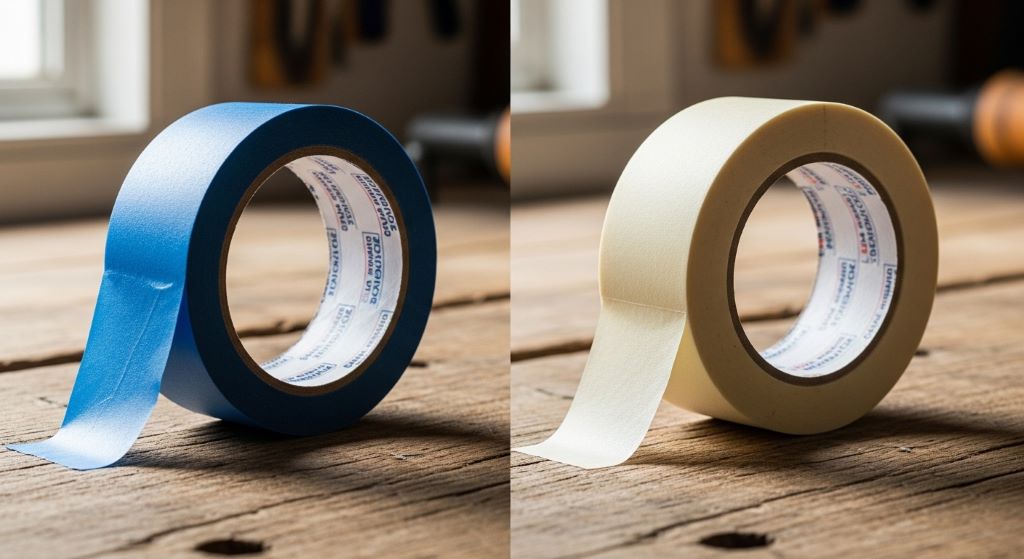
This is the tan or beige tape most people picture when they think of tape. It is made from a thin paper backing with a light adhesive. It is inexpensive and widely available. However, it is not ideal for fine edges or delicate surfaces. It can leave residue if left on too long. It works best for quick, low-stakes tasks like protecting hardware or covering outlets.
Painter’s Tape
Painter’s tape is designed specifically for painting jobs. It usually comes in blue, green, or yellow. The adhesive is gentler than standard tape, which means it releases without damaging surfaces. It also creates cleaner paint lines because the edges seal more tightly. Additionally, it can stay on surfaces longer without leaving behind sticky residue.
This is the tape most professionals reach for on home painting projects.
Specialty Tapes
Beyond these two main types, you will also find specialty options. There is tape made for delicate surfaces like fresh paint or wallpaper. There is high-temperature tape for areas near radiators or vents. There is also ultra-thin tape for very precise lines. Each serves a specific purpose, and knowing they exist can help you handle tricky situations.
Painter’s Tape vs Masking Tape: What Is the Real Difference?
This is one of the most common questions homeowners ask. The painter’s tape vs masking tape debate comes down to a few key factors: adhesive strength, edge sharpness, and how long you can leave the tape in place.
Standard masking tape uses a stronger adhesive. This can be useful in some situations. However, it also means it is more likely to pull up paint or leave residue if not removed quickly. It is generally not recommended for finished walls or trim.
Painter’s tape uses a medium-tack adhesive. This means it sticks well enough to stay put during painting, but releases cleanly afterward. Most painter’s tape can stay on surfaces for anywhere from one day to two weeks, depending on the brand and label. This flexibility is a big advantage for multi-day projects.
In terms of edge quality, painter’s tape wins clearly. The backing is slightly thicker and more rigid, which helps it resist paint bleed. When you pull it away, the line it leaves behind is crisp and clean.
For most home painting projects, painter’s tape is the smarter choice. However, if you are doing a rough task like painting a shed or a garage floor where precision does not matter, standard masking tape will do the job at a lower cost.
How to Choose the Right Width
Tape comes in many widths, typically ranging from half an inch to three inches. Choosing the right width depends on what you are covering.
For trim and baseboards, a one-inch or one-and-a-half-inch tape works well. It gives you enough coverage without wasting material. For larger flat surfaces like covering a window frame entirely, a wider tape is more efficient. You can also overlap narrow tape strips to cover large areas, though this takes more time.
Additionally, consider using painter’s plastic sheeting alongside your tape for covering furniture or floors. The tape holds the plastic in place while protecting large areas quickly.
Surface Type Matters More Than You Think
One of the biggest mistakes homeowners make is using the same tape on every surface. Different surfaces need different tape formulas.
On freshly painted walls, always use a delicate-surface tape. Fresh paint is still somewhat soft, even if it feels dry to the touch. Regular tape can bond to it and lift the finish when removed. Therefore, wait at least 24 hours after painting before applying tape, and use the gentlest option available.
On glass windows or mirrors, standard painter’s tape works well. Glass is smooth and non-porous, so there is less risk of damage. However, avoid leaving tape on glass in direct sunlight for too long. Heat can make the adhesive more difficult to remove.
On wood trim with an oil-based finish, check that your tape is compatible. Oil-based finishes take longer to cure fully. Using the wrong tape too early can ruin the finish.
On textured walls, tape can be tricky. The bumps and ridges make it harder to seal the edge tightly. In this case, press the tape down firmly using a plastic card or your fingernail. Some painters also apply a thin line of caulk along the tape edge before painting to prevent bleed-through on heavily textured surfaces.
Reading the Label: What to Look For
Tape labels can be confusing, but a few key terms are worth knowing.
Days of clean removal tells you how long the tape can stay on before it becomes hard to remove. A tape labeled “14-day” is safe to leave on much longer than one labeled “3-day.”
UV resistance matters if you are painting near windows or doing outdoor work. UV exposure breaks down adhesive faster.
Indoor versus outdoor ratings also appear on some tapes. Outdoor tape handles moisture and temperature changes better.
Additionally, some tapes are labeled “edge-lock” or “sharp lines.” These use a special sealing technology to prevent paint from creeping under the edge. They are worth the extra cost when you need very precise lines, such as when painting geometric patterns or two-tone walls.
Step-by-Step: How to Apply Tape for the Best Results
Even the best tape will fail if applied incorrectly. Follow these steps for clean, professional results.
Start with a clean surface. Dust, grease, or moisture will prevent the tape from sticking properly. Wipe down the area with a dry or slightly damp cloth and let it dry fully before applying tape.
Apply the tape slowly. Press it down in short sections, smoothing as you go. Avoid stretching the tape as you apply it. Stretched tape tends to lift or curl at the edges as it relaxes.
Use your fingernail or a plastic card to press the edge down firmly. This step is easy to skip, but it makes a big difference. A tight seal at the edge is what prevents paint bleed.
Remove the tape at the right time. For water-based paints, remove the tape while the paint is still slightly wet. This gives the cleanest edge. For oil-based paints, wait until the paint is dry to the touch, then remove slowly. Pull at a 45-degree angle back over itself, not straight out from the wall.
Common Mistakes to Avoid
Many homeowners make the same tape mistakes. Knowing these ahead of time will save you a lot of trouble.
Leaving tape on too long is one of the most common problems. Even tape rated for long-term use becomes harder to remove the longer it sits. Remove it as soon as the job allows.
Using the wrong tape for the surface is another frequent error. As mentioned earlier in this tape guide, matching the tape to the surface is essential for a clean outcome.
Applying tape to a dirty or damp surface is a recipe for failure. The tape will not stick evenly, and paint will find every gap.
Painting over the tape in thick coats also causes problems. Thick paint can seal the tape to the wall, making removal messy. Apply thin, even coats and let them dry between applications.
Budget vs. Quality: Is Expensive Tape Worth It?
It is tempting to buy the cheapest tape available. However, a small investment in better tape pays off quickly. Low-quality tape often does not seal well, which means you spend extra time touching up paint lines. It may also leave residue that requires solvents to remove.
Mid-range painter’s tape from trusted brands strikes a good balance. You do not need to buy the most expensive option for most home projects. However, for detailed work or delicate surfaces, spending a little more on specialty tape is worth it.
Think of it this way: paint, brushes, and prep supplies all cost money. Saving a few dollars on tape and then spending an hour fixing bleed marks is not actually saving anything.
Conclusion
Choosing the right tape is one of the simplest ways to improve your painting results. Start by understanding the difference between standard tape and painter’s tape. Then think about your surface type, how long the tape needs to stay on, and how precise your lines need to be. Apply the tape carefully, press the edges down firmly, and remove it at the right time.
With the right tape and a little care, you can achieve clean, sharp lines that make any paint job look professional. Additionally, do not overlook the small details like surface prep and label reading. These steps are quick but make a real difference in the final result.
Home painting does not have to be stressful. The right tools and a bit of knowledge go a long way.
Frequently Asked Questions
What is the difference between painter’s tape and regular masking tape?
Painter’s tape uses a gentler adhesive designed to release cleanly from surfaces without leaving residue or damaging paint. Regular masking tape has a stronger adhesive that can pull up finishes or leave sticky marks, especially if left on too long.
How long can I leave painter’s tape on the wall?
This depends on the product. Most painter’s tapes are rated for 1 to 14 days of clean removal. Always check the label, and remove the tape as soon as you can after painting to get the cleanest edge.
Why is paint bleeding under my tape?
Paint bleed usually happens because the tape edge was not pressed down firmly enough, or because thick coats of paint were applied. Try pressing the edge with a plastic card and apply thinner coats of paint to prevent this.
Can I use painter’s tape on freshly painted walls?
Yes, but you should wait at least 24 hours after painting before applying tape. For best results, use a delicate-surface tape to avoid lifting the existing finish.
Is green tape better than blue tape?
Green tape is generally designed for outdoor use and surfaces that need a stronger hold, while blue tape is better for indoor use on delicate surfaces. Neither is universally better. Choose based on your specific surface and project needs.
Related Topics:
Fractal Pattern Paint Accent Walls: Transform Your Space with Artistic Flair
Painting Your Fortune: Which Artworks Invite Luck and Harmony into Home?