
Do you have an underutilized garage into a guest room gathering dust and forgotten items? Imagine converting that space into a welcoming, comfortable guest room for visiting friends and family. It’s an increasingly popular home renovation project that not only adds significant value to your property but also provides much-needed extra living space.
Converting your garage into a guest room might seem like a daunting task, but with proper planning, execution, and a touch of creativity, it’s an achievable and highly rewarding endeavor. This comprehensive guide will walk you through every essential step, from initial planning to the finishing touches, ensuring your garage transformation is a resounding success.
Why Convert Your Garage into a Guest Room?
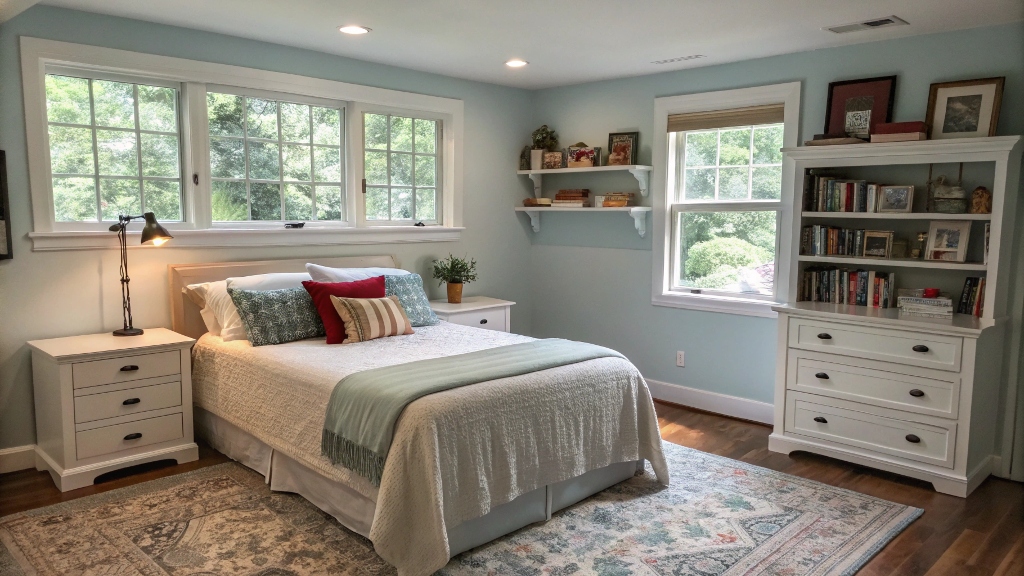
Before diving into the “how,” let’s briefly touch upon the “why.” Beyond simply offering a place for guests to sleep, a garage conversion offers numerous benefits:
- Increased Property Value: Added heated and cooled living space is a significant boost to your home’s market value.
- Cost-Effective Expansion: It’s often more affordable than building a new extension, as the basic structure (walls, roof, foundation) already exists.
- Versatility: While primarily a guest room, the space can also serve as a home office, a teenager’s retreat, an in-law suite, or even a rental unit (check local zoning laws!).
- Enhanced Functionality: It transforms an often-cluttered, underused area into a highly functional and beautiful part of your home.
- Privacy for Guests: A separate space offers more privacy for your guests and less disruption to your household.
Step 1: Planning and Research – Laying the Foundation for Success
Thorough planning is the bedrock of any successful renovation project. Don’t rush this stage!
1.1. Check Local Zoning Laws and Building Codes
This is arguably the most crucial first step. Garage conversions often fall under specific regulations. You’ll need to investigate:
- Zoning Restrictions: Are there limitations on converting garages in your area? Some communities have rules against reducing off-street parking.
- Building Permits: You will almost certainly need building permits for structural changes, electrical work, plumbing, and HVAC. Failing to obtain necessary permits can lead to fines, difficulties selling your home, and safety hazards.
- Minimum Room Sizes: There might be requirements for minimum ceiling height, window size (for egress), and overall room dimensions.
- Septic/Sewer Capacity: If you’re adding a bathroom, ensure your existing septic or sewer system can handle the increased load.
Actionable Tip: Visit your local planning or building department’s website, or better yet, schedule a meeting with a planning officer to discuss your project. They can provide invaluable guidance and clarify what’s permissible.
1.2. Define Your Budget
Determine how much you’re willing and able to spend. Garage conversions can range from basic to luxurious. Consider:
- Materials: Flooring, insulation, drywall, paint, windows, doors.
- Labor: Contractors, electricians, plumbers, HVAC technicians.
- Fixtures: Lighting, plumbing fixtures, furniture.
- Contingency Fund: Always allocate an extra 10-20% for unexpected expenses.
Actionable Tip: Get multiple quotes from contractors to compare prices and ensure you’re getting a fair deal.
1.3. Design and Layout
Think about the functionality and aesthetics of your new guest room.
- Floor Plan: Sketch out possible layouts. Will you include an en-suite bathroom? A small kitchenette? A closet?
- Natural Light: How can you maximize natural light? Will you add new windows or enlarge existing ones?
- Accessibility: Consider if the room needs to be ADA-compliant or easily accessible for elderly guests.
- Entry/Exit: How will guests enter and exit? Will you keep the main garage door opening or wall it up and add a regular exterior door?
1.4. Professional Help – When to Call in the Experts
While some DIY is possible, certain aspects require professional expertise:
- Architect/Designer: For complex layouts or if you need help visualizing the space.
- Structural Engineer: If you plan significant structural changes (e.g., removing load-bearing walls).
- Licensed Electrician: For all new wiring, outlets, and lighting. Electrical work is not a DIY task for safety reasons.
- Licensed Plumber: If adding a bathroom or kitchenette.
- HVAC Specialist: To extend your existing heating/cooling system or install a new one.
Actionable Tip: Interview several contractors, check their references, and review their portfolios. Ensure they are licensed and insured.
Step 2: The Core Conversion – Transforming the Structure
Once permits are secured and plans are finalized, it’s time to get hands-on.
2.1. Demolition and Preparation
- Clear Out the Garage: Remove everything! This is a good opportunity to declutter and organize.
- Deal with the Garage Door Opening: You’ll likely want to fill this in with a framed wall that matches the rest of your home’s exterior, incorporating a window or a regular door.
- Clean the Floor: Sweep, vacuum, and clean the concrete slab thoroughly.
2.2. Leveling and Insulating the Floor
Most garage floors are sloped towards the garage door for drainage. You’ll need to level it.
- Leveling: Use self-leveling concrete or construct a new subfloor system to create a level surface.
- Vapor Barrier: Install a vapor barrier over the concrete to prevent moisture from wicking up into your new flooring.
- Insulation: Insulate the floor to keep the room warm in winter and cool in summer. Rigid foam insulation boards are commonly used.
2.3. Walls and Ceiling – Insulation is Key!
Garages are typically uninsulated. This is critical for comfort and energy efficiency.
- Wall Framing: If you’re building new interior walls (e.g., for a bathroom), frame them out.
- Insulation: Insulate all exterior walls and the ceiling. Batt insulation (fiberglass or mineral wool) or spray foam are common choices. Pay attention to R-values required in your climate zone.
- Vapor Barrier: Depending on your climate, you may need a vapor barrier on the warm side of your insulation.
- Drywall: Install drywall on walls and ceilings. Finish with joint compound and sanding for a smooth surface.
2.4. Windows and Doors
- New Windows: Add windows to allow natural light and provide proper ventilation. Ensure they meet egress requirements for safety.
- Exterior Door: Replace the garage door opening with a solid, insulated exterior door, or add a new one if preferred.
- Interior Doors: Install doors for the guest room and any internal bathroom.
Step 3: Utilities and Finishing Touches – Bringing it to Life
With the structural work complete, focus on the functional and aesthetic elements.
3.1. Electrical and Lighting
- New Circuits: Your electrician will run new circuits for outlets, lighting, and any appliances (e.g., mini-fridge, microwave).
- Outlets: Install plenty of outlets, including some with USB ports for convenience.
- Lighting: Plan for a mix of ambient (recessed lights, ceiling fixture), task (reading lamps), and accent lighting.
3.2. Plumbing (If Adding a Bathroom/Kitchenette)
- Rough-in Plumbing: Your plumber will install the necessary pipes for a toilet, sink, shower, or any kitchenette fixtures.
- Water Heater: Consider a small, dedicated water heater if your main one is far away or insufficient.
3.3. HVAC – Heating and Cooling
- Extend Existing System: If your home’s HVAC system can handle the added load, extend ducts into the new room.
- Ductless Mini-Split: A highly efficient and popular option for garage conversions. These units provide independent heating and cooling for the new space.
- Baseboard Heaters/Window AC: Less ideal for a comfortable guest room, but options if budget is extremely tight.
3.4. Flooring
- Subfloor: If you built a raised subfloor, ensure it’s secure.
- Flooring Material: Choose a durable and attractive flooring material. Options include:
- Laminate: Cost-effective, good looking, and durable.
- Vinyl Plank: Waterproof, durable, and comes in various styles.
- Engineered Hardwood: Offers the look of real wood without the cost or susceptibility to moisture issues.
- Carpet: Cozy and reduces noise, but less practical for high-traffic areas.
- Tile: Durable, great for bathrooms or entryways, but can be cold underfoot.
3.5. Drywall Finishing and Painting
- Primer: Apply a good quality primer.
- Paint: Choose a color that promotes relaxation and matches your design aesthetic. Light, neutral colors often make a space feel larger and more inviting.
Step 4: Furnishing and Decorating – The Grand Reveal
Now for the fun part!
4.1. The Bed
- Comfort is Key: Invest in a comfortable mattress. This is a guest room, after all!
- Bed Size: Consider a queen or full-sized bed, depending on room dimensions.
- Bedding: High-quality sheets, pillows, and a cozy duvet or comforter.
4.2. Essential Furniture
- Nightstands: With lamps and charging options.
- Dresser/Closet: Storage for guests’ belongings. If no built-in closet, a wardrobe works well.
- Seating: A comfortable armchair or small sofa if space allows.
- Small Desk/Table: Useful for a laptop or just a place to set things.
4.3. Amenities and Thoughtful Touches
- Mirror: Full-length and/or a smaller vanity mirror.
- Window Coverings: Blinds, curtains, or shades for privacy and light control.
- Towels: Fresh, plush towels if there’s a bathroom.
- Connectivity: Wi-Fi access (clearly labeled!), outlets, and possibly a smart TV.
- Welcome Basket: A nice touch with water bottles, snacks, local guides, and emergency toiletries.
- Climate Control: Ensure guests know how to operate the thermostat or mini-split.
4.4. Decor and Personalization
- Artwork: Add personality and visual interest.
- Rugs: Define zones and add warmth.
- Plants: Bring life and freshness to the space.
- Storage Solutions: Baskets, hooks, and shelves to keep things tidy.
Read More Also: Elevate Your Bathroom: The Ultimate Guide on How to Install a Walk-in Shower
Conclusion: Your Guest Room Awaits!
Converting your garage into a guest room is a significant undertaking, but the rewards are immense. You’ll gain valuable living space, increase your home’s appeal and value, and provide a comfortable, private haven for your visitors. By meticulously planning, adhering to building codes, and investing in quality workmanship, you can transform that forgotten garage into a dream guest room that friends and family will adore for years to come. Start your planning today, and unlock the hidden potential of your home!